


Restoring an old piece of furniture isn't just a project; it's a conversation with the past. The real art is respecting its original story while you carefully clean, repair, and refinish it. This is a delicate balance, blending a deep appreciation for history with the hands-on skill of preservation.
The Soul of a Story: How to Approach Antique Restoration
Before you pick up sandpaper, let's talk mindset. This isn't about slapping on chalk paint to hide imperfections. It’s about honoring the journey of a piece—celebrating the nicks, dings, and gentle wear that tell its unique story.
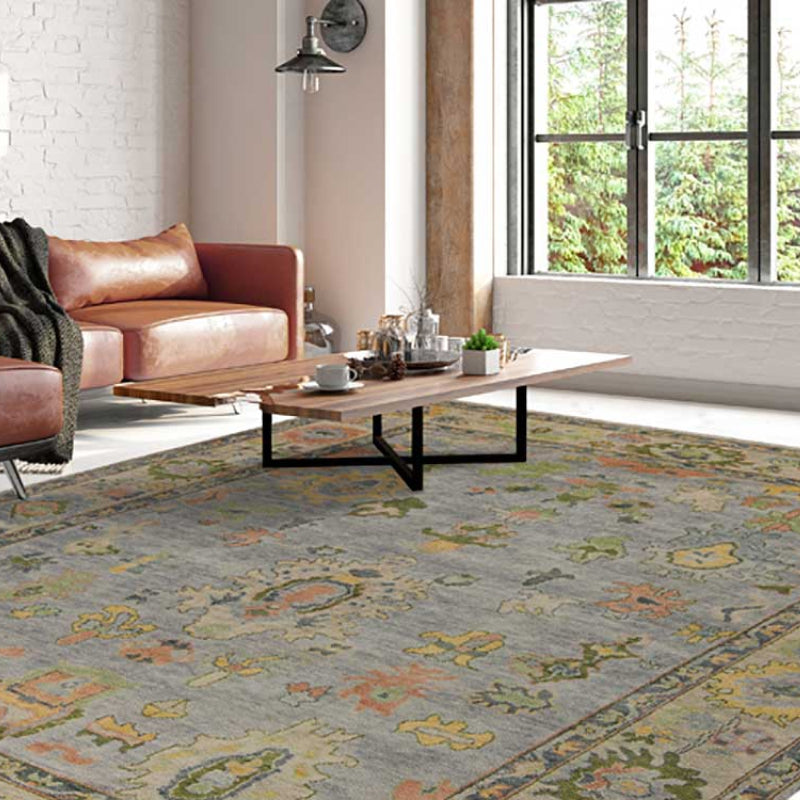
This perspective is what separates a quick DIY job from a thoughtful, lasting restoration. It’s the difference between something that looks temporarily refreshed and something that has its value and beauty genuinely enhanced. Here in Atlanta, from the historic homes of Buckhead to the beautiful estates in Roswell, we see homeowners and designers choosing to restore rather than replace. They get it. They understand they’re preserving not just wood and fabric, but a legacy.
Spotting a Piece Worth the Effort
Not every old piece is a diamond in the rough. The first step is learning to identify furniture that’s truly worth your time and investment. A solidly built frame from a quality maker like Lee Industries, for example, is almost always a great candidate for a new life. As we've mentioned before in our article on why to support local craftsmanship with Lee furniture, good bones are everything.
Keep an eye out for these signs of solid craftsmanship:
- Solid Wood Construction: Lift a corner. Does it feel substantial? Look for consistent wood grain from the top surface to the underside.
- Dovetail Joints: Pull out a drawer. Jagged, interlocking joints (especially if they look slightly imperfect) are often hand-cut dovetails—a clear sign of quality antique construction.
- Maker's Marks: Check for any labels, stamps, or faint signatures inside drawers, on the back, or underneath.
These details are clues that you’re dealing with something special—an item built with pride, meant to last for generations. This growing appreciation for heirloom quality isn't just a trend; it's a real shift.
The antique restoration market is making a huge comeback, driven by a younger generation that values sustainability and unique pieces with a story. They're choosing to bring family heirlooms back to life instead of adding to our throwaway culture.
The numbers back this up. This movement toward preserving history is creating serious growth. The demand for restoration services is projected to grow at a 7% CAGR through 2033, as more people invest in what they already own. You can read more on these antique restoration market insights to see just how much sustainability is influencing today's design choices.
The Power of Quality Materials
Once you've found a worthy piece, the project's success hinges on the quality of your materials. Using cheap wood filler or a generic fabric is like putting budget tires on a vintage Porsche—it undermines the integrity of the original.
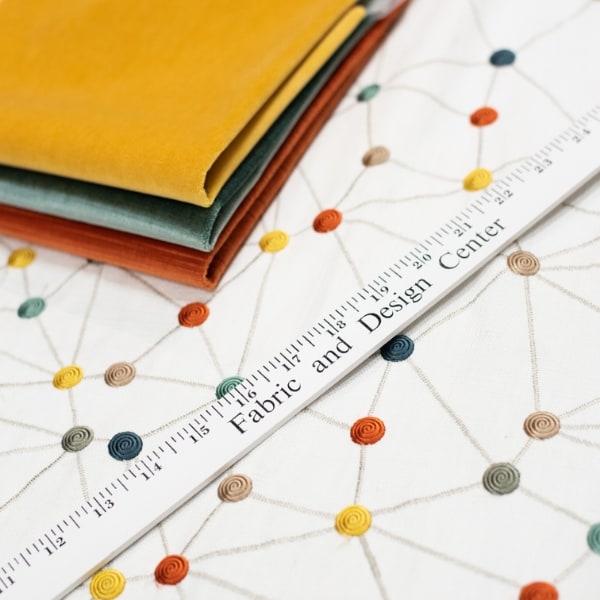
To achieve a result that feels both timeless and luxurious, high-quality materials are non-negotiable. This means selecting the right wood glues, period-appropriate finishes, and exceptional textiles. A classic Wesley Hall sofa or a well-loved Verellen chair can be reborn with the right custom upholstery. A visit to our Atlanta fabric showroom on East Paces Ferry can open your eyes to a world of designer fabrics that will elevate an antique from a forgotten piece to the stunning heart of a room.
Getting to Know Your Antique Piece Like an Old Friend
Every restoration project, whether it's a family treasure from your Alpharetta home or a lucky find for a client in Marietta, starts with an honest-to-goodness assessment. This is the detective work. It’s where you uncover the piece's history, get to know its construction, and figure out exactly what it needs from you.
Before you even think about new fabrics or fancy finishes, you have to understand the bones of what you're working with. This isn't just about spotting what's wrong; it’s about appreciating the piece's unique character. Are we talking about a rock-solid piece from a well-known maker like Wesley Hall, or a more delicate item that needs a lighter touch? This first step guides every decision you make.
How to Read the Clues in the Construction
The way a piece of furniture is put together tells you everything—its age, its quality, its story. High-end furniture, whether it's brand new from our Buckhead showroom or a century old, always has tell-tale signs of real craftsmanship. Once you know what to look for, you can plan your restoration with the respect the piece deserves.
Here’s where to start your investigation:
- Joints Tell a Story: Pull a drawer out and peek at the corners. See those interlocking "pins" and "tails" that look a little irregular? You've found hand-cut dovetails, a hallmark of pre-industrial furniture and a dead giveaway of quality. If they look perfectly uniform, it's a later, mass-produced piece.
- Solid Wood vs. Veneer: Don't let a beautiful surface fool you. Check the edges. If the wood grain wraps cleanly from the top surface over the edge, you're looking at solid wood. If you spot a thin layer of gorgeous wood over a less expensive core, that’s veneer. Both have their beauty, but fixing chipped veneer is a completely different ballgame than sanding a scratch in solid wood.
- Look for the Maker's Mark: The best furniture makers, from artisans of old to modern masters like Verellen and Lee Industries, almost always sign their work. Hunt for stamps, labels, or faint pencil marks on back panels, inside drawers, or underneath the main frame. A maker's mark can instantly tell you about a piece's history and value.
Documenting Condition Like You're on CSI
Now that you've played historian, it’s time for a detailed "condition report." This isn't a quick once-over. This is a methodical, inch-by-inch inspection that will become your restoration roadmap. It helps you avoid nasty surprises and decide if this is a weekend project or if it needs the steady hand of an Atlanta restoration pro.
Grab a notepad, a flashlight, and get up close and personal. Your goal is to make an exhaustive list of every single issue, no matter how small.
A thorough assessment is the single most important step in how to restore antique furniture. It’s what separates a thoughtful, value-enhancing project from a potential disaster. Rushing this stage is the number one mistake amateurs make.
Your checklist needs to cover both structure and surface.
Structural Integrity Checklist:
- The Wobble Test: Set the piece on a flat floor. Gently push on the corners. Does it rock or sway? Wobbly legs or a loose frame point to failing joints that must be fixed first.
- Joint Inspection: Look closely at every joint. See gaps? Is old, crusty glue crumbling out? These joints need to be carefully taken apart, cleaned, and re-glued for a lasting repair.
- Drawer Function: Do the drawers slide smoothly, or do they catch and bind? Check the runners and guides inside the frame for wear and tear.
- Hardware Check: Take inventory of all knobs, pulls, and hinges. Are they all original? Any missing or broken? Finding a perfect match for antique hardware can be a challenge, so know what you're working with from the start.
Surface and Finish Checklist:
- Finish Condition: Note any cracking (a finish that looks like alligator skin), cloudiness, or flaking. Is the original finish still there, or has someone done a less-than-stellar refinishing job?
- Scratches, Dents, and Gouges: Document the location and severity of all dings and damage on the surface.
- Veneer Issues: Scan for any spots where veneer is lifting, bubbling, or chipped. Gently press on suspicious areas to feel if they're loose.
- Past Repairs: Spot signs of clumsy fixes? Keep an eye out for modern screws where they don't belong, mismatched wood putty, or sloppy glue drips. Knowing what was done before helps you anticipate what you might find as you dig deeper.
Once you've gone through this process, you’ll have a complete picture of the project. This detailed assessment is the true foundation of a successful restoration, ensuring the timeless beauty of your furniture is ready for the next generation.
The Gentle Art of Cleaning and Stripping Finishes
This is where patience becomes your most valuable tool. The goal isn’t to blast away the years and make an antique look factory-new; that’s how you destroy its soul and value. The art is in gently removing decades of grime, wax buildup, and failing finishes to reveal the beautiful wood beneath without erasing its history.
Think of it less like demolition and more like archaeology. You are carefully uncovering original beauty. For homeowners in historic North Georgia, distinguishing between dirt and a gracefully aged patina is a skill that can make or break a project.
Aggressive chemical strippers should be your absolute last resort. So many cherished pieces have been irreversibly damaged by an overeager hand. Before you reach for anything potent, you need a strategy.
Starting With The Softest Touch
Always begin with the gentlest method possible. You can escalate your approach, but you can never undo damage from a harsh chemical or over-scrubbing. The first step is a simple, thorough cleaning to see what you're really dealing with.
- Dust and Cobwebs: Start with a soft microfiber cloth and a soft-bristled brush to get into carvings and crevices.
- Mild Soap Solution: Mix a few drops of a gentle, pH-neutral soap into a bowl of distilled warm water. Dampen a clean cloth, wring it out until it's nearly dry, and gently wipe the surface.
- Rinse and Dry: Immediately follow with another cloth dampened with only distilled water to remove any soap residue, then dry the surface completely with a third clean, dry cloth.
Sometimes, a good cleaning is all a piece needs. For more comprehensive techniques, you can find a wealth of expert tips for cleaning antique wooden furniture safely to ensure you're protecting your piece.
Choosing Your Cleaning and Stripping Method
When simple cleaning isn't enough, you have to decide on the next step. Choosing the right method is critical to preserving the wood's integrity. Below is a breakdown of common approaches, from gentlest to most aggressive.
| Method | Best For | Pros | Cons / Risks |
|---|---|---|---|
| Mineral Spirits | Removing old wax, polish, and oily grime. | Very safe for most original finishes; evaporates without residue. | Won't remove shellac, varnish, or lacquer. Requires good ventilation. |
| Denatured Alcohol | Testing for and removing shellac finishes. | Effective on shellac; relatively fast-acting. | Can damage other finishes; flammable. Can dry out wood if overused. |
| Refinishing Solvents | Softening and "re-amalgamating" old varnish or lacquer without fully stripping. | Can revive a crazed or cloudy finish, preserving the original layer. | Requires skill to apply correctly; may not work on all finishes. |
| Gel / Paste Strippers | Removing multiple layers of paint, varnish, or lacquer. | Less messy than liquid strippers; clings to vertical surfaces. | Often contains harsh chemicals (methylene chloride); requires significant safety precautions. |
| Heat Gun | Softening thick layers of paint for scraping. | No chemical residue; effective on heavy paint buildup. | High risk of scorching the wood; can release toxic fumes from old lead paint. |
Remember, the goal is to use the least invasive method that gets the job done. Always start with mineral spirits before considering a full strip.
When To Bring In Reinforcements
If gentle cleaning doesn't cut it, it's time to move on to something slightly stronger, but still safe. Mineral spirits are excellent for dissolving old wax and oily residue without harming the original finish.
Dampen a clean cloth with odorless mineral spirits and gently wipe a small, inconspicuous area. You'll often see years of old furniture polish and dirt lift right off. Work in small sections, changing your cloth frequently. And please, always work in a well-ventilated space.
Never forget the golden rule of restoration: test every single product—even simple soap and water—on a hidden spot first. The inside of a leg, the back of the piece, or the underside of a shelf are all perfect testing grounds.
This methodical process is central to professional work and drives a deep appreciation for handcrafted pieces. The global antique furniture restoration market is valued between $500 million and $2 billion as of 2025. This growth reflects a real shift towards sustainable design, with many clients seeking complete, meticulous restorations.
But deciding whether to tackle this yourself or call a professional from the Atlanta area can be tough. This simple decision tree can help you determine the best path forward.
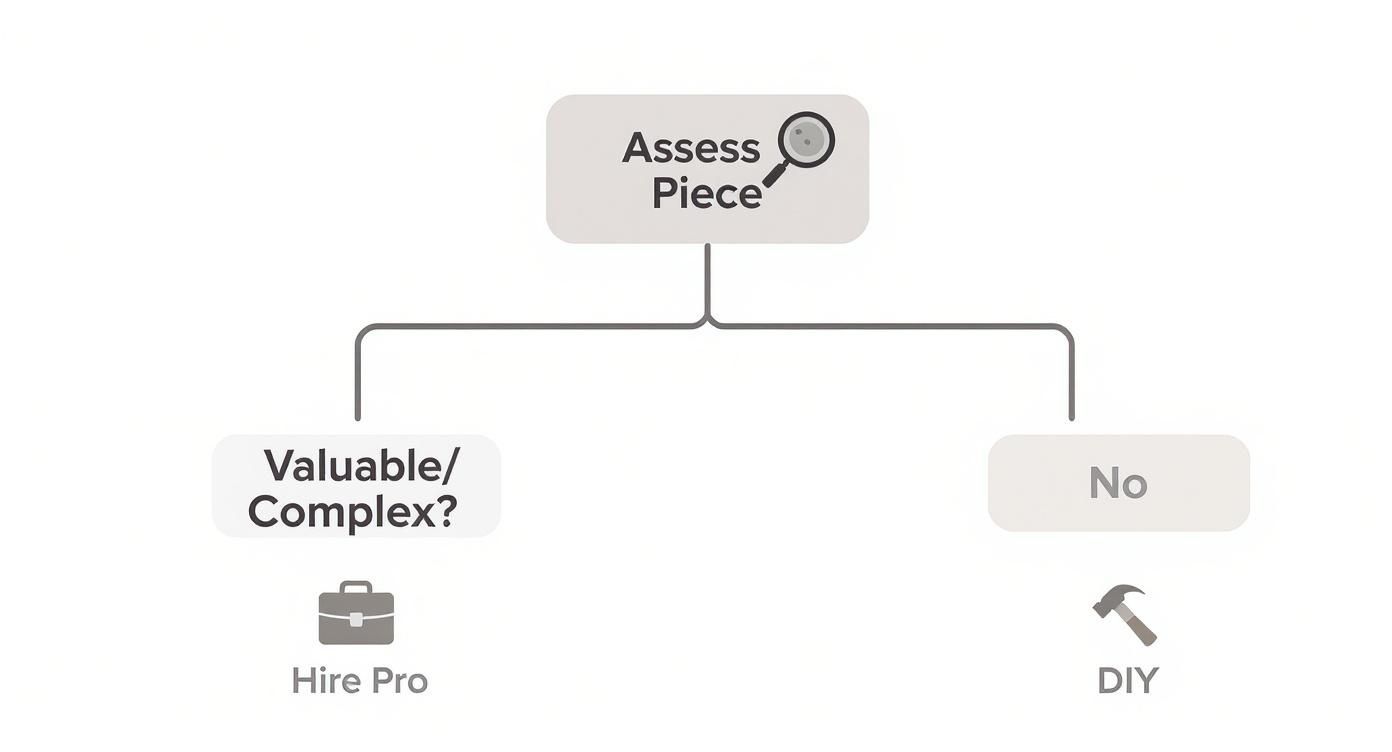
As the chart illustrates, the decision often comes down to the piece's value and the complexity of the job.
Recognizing A Finish Worth Saving
The most critical skill is learning to recognize an original, stable finish that should be preserved, not stripped. This aged surface, known as patina, is a delicate map of the furniture's life. It includes subtle color changes in the wood, tiny imperfections, and a soft sheen that only time can create.
Stripping a valuable piece with its original patina can slash its value instantly. If the finish is simply dirty or dull but is otherwise intact (not cracking or flaking), your job is to clean and conserve it, not remove it. A careful cleaning followed by an application of high-quality paste wax can revive a finish beautifully, preserving the antique's integrity and story.
Getting into the Bones: Structural and Cosmetic Repairs
A gorgeous new finish means nothing if it's on a wobbly chair. After the gentle work of cleaning, it's time to get to the heart of the matter—the piece's structural integrity. This is where real craftsmanship comes into play, turning a fragile antique into something sturdy you can use for decades.
This whole phase is about the bones. We'll walk through the essential repairs, from loose legs to chipped veneer, that separate a quick fix from a high-quality, lasting restoration. This is the kind of detailed work that makes a piece feel right at home in a luxury furniture collection in Buckhead or Roswell.
Stabilizing the Foundation: Loose Joints
The most common problem with old furniture? Loose joints. It’s inevitable. Over time, original glue gives up, causing that dreaded wobble. The temptation is to just squirt new glue into the gap and call it a day. Don't do that. A real repair requires more finesse.
To do it right, you have to completely disassemble the joint.
- Take It Apart Carefully: Gently work the loose parts apart. A rubber mallet and a block of scrap wood can help you tap them loose without a mark. Grab some painter's tape and label every part so you remember how it all goes back together.
- Clean the Joint: This is the most important step. You have to scrape and sand away every last speck of that old, brittle glue. New glue will not bond to old glue. A clean surface is non-negotiable for a strong repair.
- Always Dry Fit First: Before you open the glue bottle, reassemble the clean, dry joint. Make sure everything fits snugly. This is your last chance to spot issues before they become a sticky, permanent mess.
- Glue and Clamp: Apply a thin, even layer of high-quality wood glue (we love Titebond III) to the joint surfaces. Reassemble and use clamps with padded jaws to hold it tight while the glue cures. Wipe away any excess glue that "squeezes out" with a damp cloth right away.
The Art of the Invisible Cosmetic Fix
Once the structure is rock solid, you can turn your attention to the surface. Scratches, gouges, and chipped veneer are battle scars, but sometimes they're too distracting. Forget generic, one-color wood putty; a professional-level repair takes an artistic touch.
For deeper gouges, two-part epoxy wood fillers are fantastic. They’re incredibly strong, they sand down beautifully, and they won't shrink. The real secret is how you color-match it. Instead of trying to match the wood stain with the filler, start with a neutral base.
Once the epoxy filler has cured and you've sanded it smooth, use artist's oils or special touch-up powders to grain the repair. You're literally painting the wood grain back in by hand to match the surrounding area. It takes patience, but the result is a mend that's virtually invisible.
Tackling Troublesome Veneer
Chipped or bubbling veneer looks intimidating, but it’s often a straightforward fix. For a bubble, use a syringe to inject a small amount of wood glue right underneath the loose spot. Then, cover the area with wax paper and press it flat with a heavy weight or a clamp over a wood block to spread the pressure evenly.
For a chip, you'll need to create a patch.
- Find a Match: Hunt for scrap veneer that matches the grain and color of your antique.
- Create a "Patch Bay": Lay the patch veneer over the damaged area, making sure the grain is aligned. With a sharp craft knife and a straightedge, cut through both the patch and the original veneer underneath at the same time. This creates a perfectly matched shape.
- Clean and Glue: Carefully pop out the damaged original veneer from your cut-out area. Glue your new, perfectly-sized patch into place, let it cure, and then sand it flush.
This dedication to doing things the right way is why the restoration industry is so resilient. The global market for furniture repair and restoration was valued at around $7.2 to $7.3 billion in 2024. In the U.S., homeowners preserving their furniture make up over half of the industry's revenue. That's a strong, consistent demand for quality. For particularly tricky issues, professional furniture fitting services can be a lifesaver. Mastering these techniques ensures your antique is not just beautiful, but ready for its next hundred years.
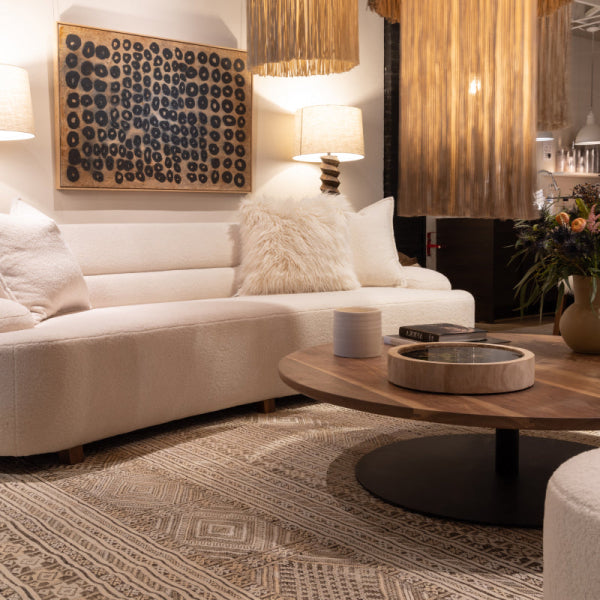
The Art of Finishing and Upholstery
This is it. The moment of transformation. The finish and the fabric are the grand finale—the elements that protect the wood, define the style, and turn a well-repaired piece into a work of art.
Get this part right, and your piece will command attention in any room. This is where a simple antique becomes a piece of luxury furniture Atlanta designers and homeowners covet. It’s about choosing a finish that honors the wood and a fabric that tells a new story.
Choosing The Perfect Finish for Your Piece
The finish is your furniture’s first line of defense, but it also dictates its final look and feel. Do you want a deep, hand-rubbed glow or a resilient, modern sheen? The choice is crucial.
Forget the one-size-fits-all approach. Each type of finish has its own personality.
- Penetrating Oil Finishes: Think Tung or Danish oil. These finishes soak into the wood, creating a beautiful, low-sheen luster that feels incredibly natural. It’s the perfect choice for showing off the grain of gorgeous walnut or mahogany. The downside? Less protection against spills.
- Waxes: A high-quality paste wax is more of a final polish than a primary finish. Applied over an oil or shellac finish, it adds protection and creates a soft, satiny glow that can be buffed to your desired sheen. A classic, time-honored technique.
- Shellac: The traditionalist's choice. For centuries, shellac was the finish for fine furniture. It dries quickly, imparts a warm amber tone, and can be polished to a high gloss. However, it’s not very durable against water or alcohol.
- Varnish & Polyurethane: The modern workhorses. They form a tough, durable film on top of the wood, offering excellent protection. Polyurethane is particularly resilient, making it a good choice for high-use items like tabletops. Just be mindful—a thick, plastic-y coat can make an antique look cheap.
The secret to a professional-looking finish isn't the product, but the preparation. The wood surface must be flawlessly smooth and clean. Any dust or debris left behind will be permanently sealed under the new finish.
Reimagining a Classic With Custom Upholstery
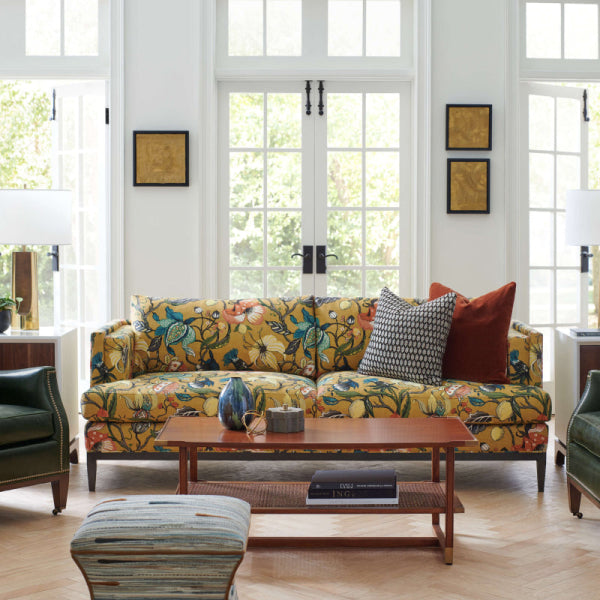
For upholstered antiques, the fabric is where the magic happens. This is your chance to elevate a piece from dated to designer. A tired, old frame can be completely reborn with the right textile, turning it into a bespoke statement piece.
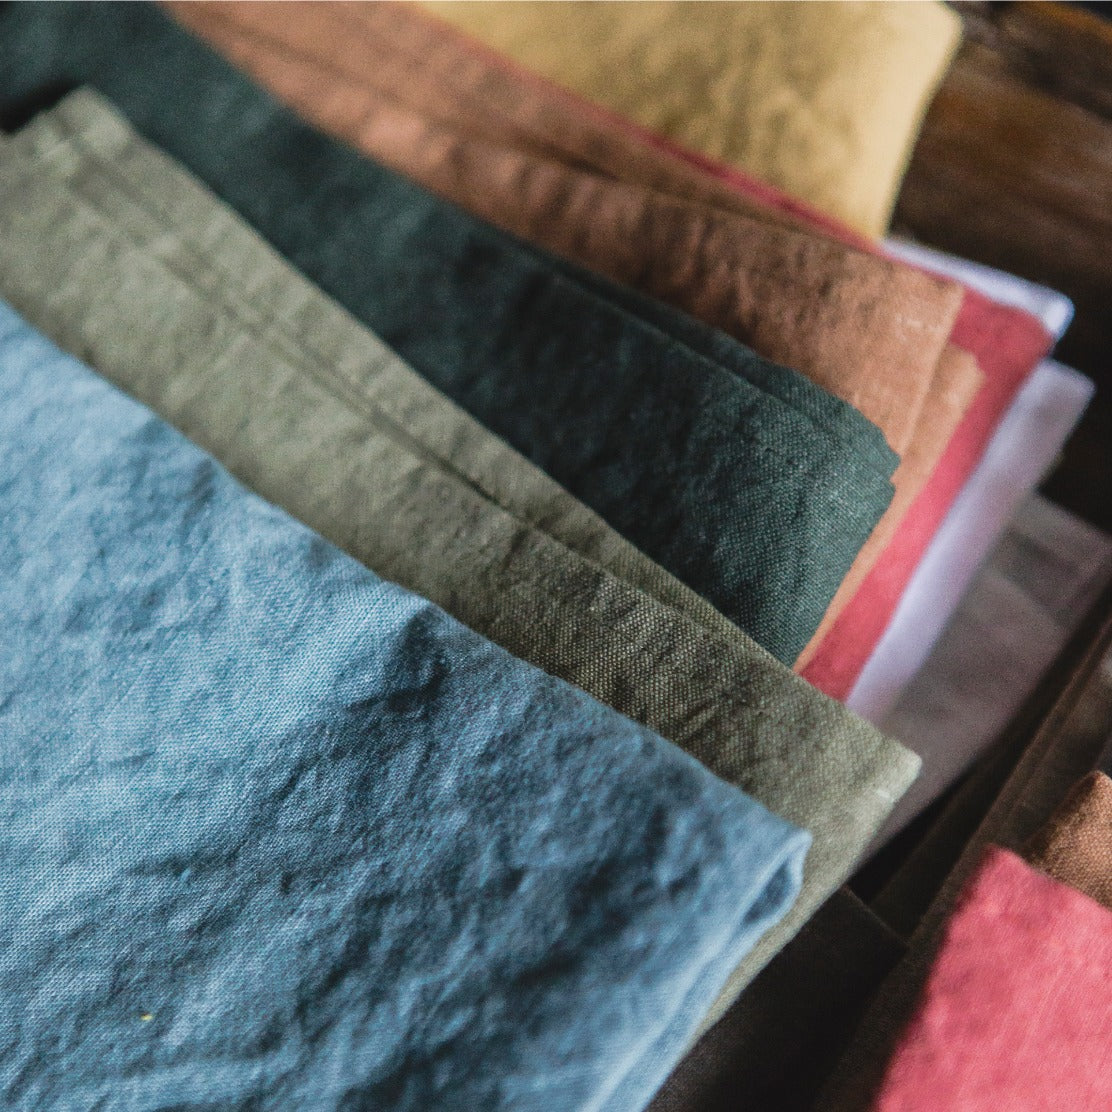
Imagine a classic Wesley Hall sofa, with its timeless lines, reborn in a bold, contemporary print. Or think of a set of antique Lee Industries chairs given new life with a sumptuous Belgian linen. This is how you bridge the gap between historic craftsmanship and modern living.
Our Atlanta fabric showroom is a playground for designers and homeowners from Buckhead to Milton for this very reason. It’s where you can touch and feel exquisite textiles you won't find in a big-box store. Choosing a high-quality, designer fabric isn't just an aesthetic choice; it’s an investment in durability and longevity.
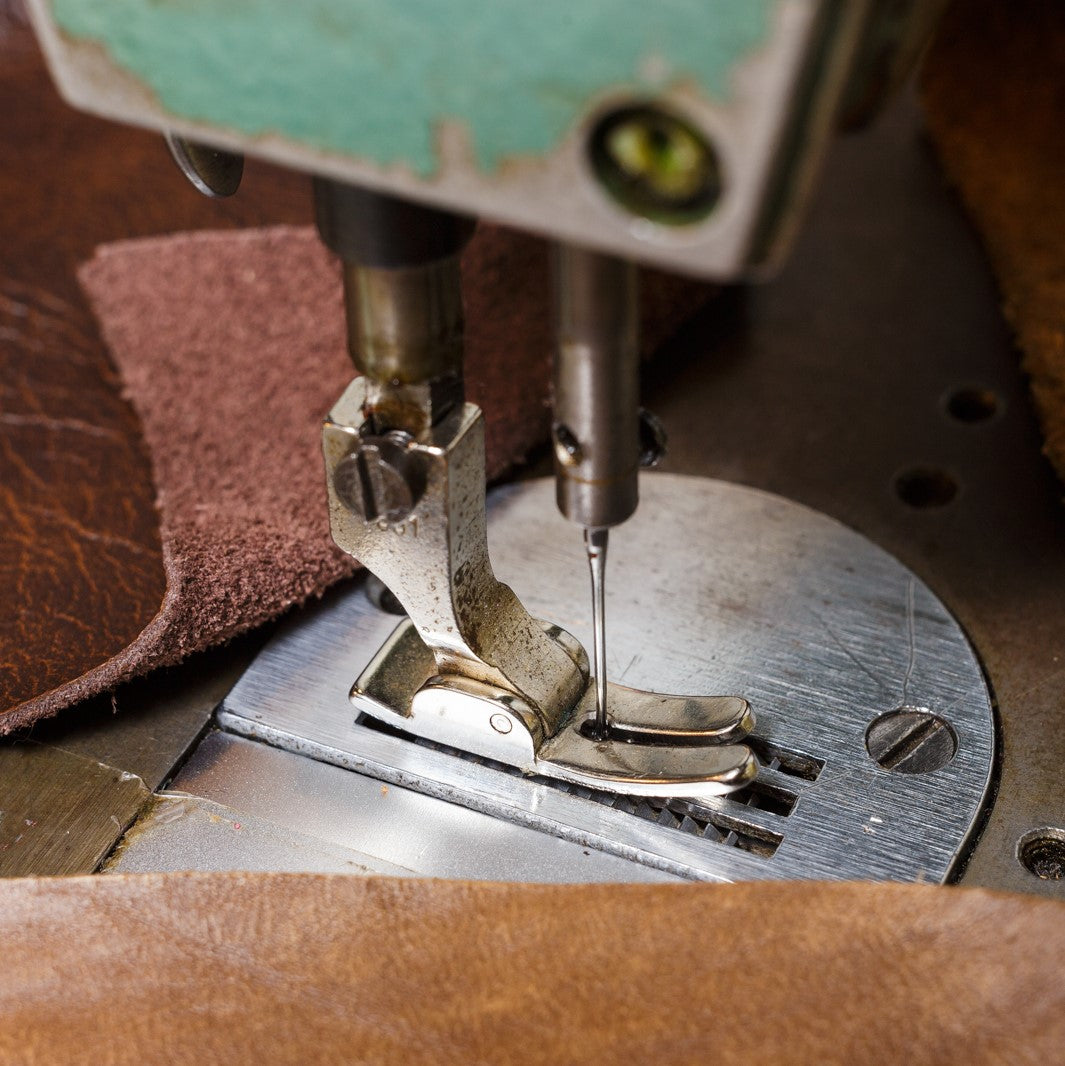
The Professional Touch
Reupholstery is far more than just stapling on new fabric. A professional custom upholstery job respects the piece's original lines. It involves replacing old batting, re-tying springs, and ensuring every welt cord is perfectly straight. It's a skill that honors the furniture’s soul.
For those undertaking this intricate process, our guide on how to reupholster furniture provides a detailed look into the steps involved. It’s an art form, and it’s a service we proudly offer to clients across Atlanta and North Georgia. Interior designers often use our trade furniture program to access both our fine fabrics and expert upholstery services, ensuring a flawless result for their high-end projects.
Whether you're carefully applying a hand-rubbed oil finish or selecting the perfect fabric to breathe new life into an heirloom, this final stage celebrates the piece’s journey. It's the final, loving touch that prepares it for its next chapter.
Answering Your Antique Restoration Questions
After walking through the steps, the questions always bubble up. Over the years in our Buckhead showroom, we’ve heard it all from curious homeowners and seasoned interior designers alike. It's one thing to read a guide, but another to be standing in front of your own cherished piece, wondering where to begin.
Let's clear the air and tackle some of the most frequent questions we hear about antique furniture restoration. Think of this as a friendly chat with an expert who wants to see your project turn out beautifully.
How Can I Tell If My Furniture Is Valuable Before Restoring It?
This is the big one. Before you touch a piece, you need a solid sense of what you're working with. Value isn't just about age; it’s a mix of several factors.
First, put on your detective hat. Hunt for any maker's marks or labels—they love to hide inside drawers, on the back panels, or stamped discreetly on the underside.
Next, look closely at the construction. Are the dovetail joints in the drawers cut by hand? Is the piece made from solid wood, or is it a thin veneer over lesser wood? These details are the classic hallmarks of quality craftsmanship.
Finally, consider its condition, rarity, and provenance (the piece's ownership history). If you have even the slightest hunch that your find from a Roswell estate sale might be something special, get a professional appraisal. Restoring a valuable antique without expert knowledge can absolutely tank its worth.
What Is the Difference Between Refinishing and Restoring?
This distinction is at the heart of how we approach antique furniture. The terms are often used interchangeably, but to a professional, they mean very different things.
- Restoration is about conservation. The goal is to bring a piece back to its original condition using period-appropriate techniques and materials. We want to preserve as much of the original character—including that beautiful, time-worn patina—as possible.
- Refinishing is a much more aggressive process. It involves completely stripping the original finish to bare wood and applying a new one. While sometimes necessary for heavily damaged pieces, it can erase the historical and monetary value of a true antique.
For a family heirloom or a piece from a notable maker like Ambella Home Collection, thoughtful restoration is almost always the right path.
When Should I DIY Versus Hiring an Atlanta Professional?
Going the DIY route can be incredibly rewarding, especially for sturdy pieces where the value is more sentimental than monetary. If you're tackling simple cosmetic fixes on a piece you love, by all means, dive in.
However, it's time to call a professional when you're dealing with furniture that is highly valuable, has complex structural damage (like tricky veneer repair), or requires specialized skills like custom upholstery. For our clients across the Atlanta area, from East Cobb to Forsyth County, professional services are the best way to protect the integrity and value of the piece. A botched repair on a fine antique is often irreversible and heartbreaking.
You can get a sense of the financial side by reading guides on upholstery costs, but the peace of mind that comes with expert craftsmanship is priceless.
The biggest and most damaging mistake people make is being too aggressive. Over-sanding, which erases details and wears through veneer, and using harsh chemical strippers that destroy the wood’s patina are the top offenders.
Patience is a restorer's greatest virtue. Always start with the gentlest cleaning method possible and only escalate if you must. Remember the golden rule: you can always take more finish off, but you can never put the original history and patina back on. This careful approach separates a beautiful restoration from a costly mistake.
Ready to bring your vision to life? At Lewis and Sheron Textiles, we’re more than just a source for exquisite fabrics and fine furniture—we’re your design partner. Visit our Atlanta showroom to explore collections from Verellen, Wesley Hall, and LEE Industries, or consult with our experts about our custom upholstery and restoration services.
Discover the possibilities at https://lsfabrics.com.