













The light is the reason you bought the house. It comes through a half-round arch over the front door, or a tall segmental window above the stair landing, and it travels across the wall all afternoon. Then you go to buy curtains, and every panel in the showroom is a rectangle.
An arch is a performance problem wearing a beautiful costume. It pushes light where a straight rod can't reach, it makes heavy fabric hang off the curve when panels are cut for a box, and it puts the operating hardware higher than anyone wants to touch twice a day. Treat custom drapes for arched windows as a small engineering project and the design questions get easier, not harder.
What follows is the sequence a workroom needs from you: the measurements, the design family, the fullness and lining, the hardware, and the installation checks that keep a reorder from happening.
Measure Your Arch in Five Steps
The reorder almost always starts with one number. Someone measures the width of the arched window, orders panels built for a rectangle, and hangs them a week before a dinner party. The fabric clears the casing at the bottom, then catches the curve at the top, the reveal runs from two inches to nothing, and the whole wall looks tilted.
The cure is a site survey taken with the arch treated as a shape rather than a height and a width. The Wayfair arched-window curtain guide sets out the full set of readings a workroom needs before drafting panels, and the order below follows that logic.
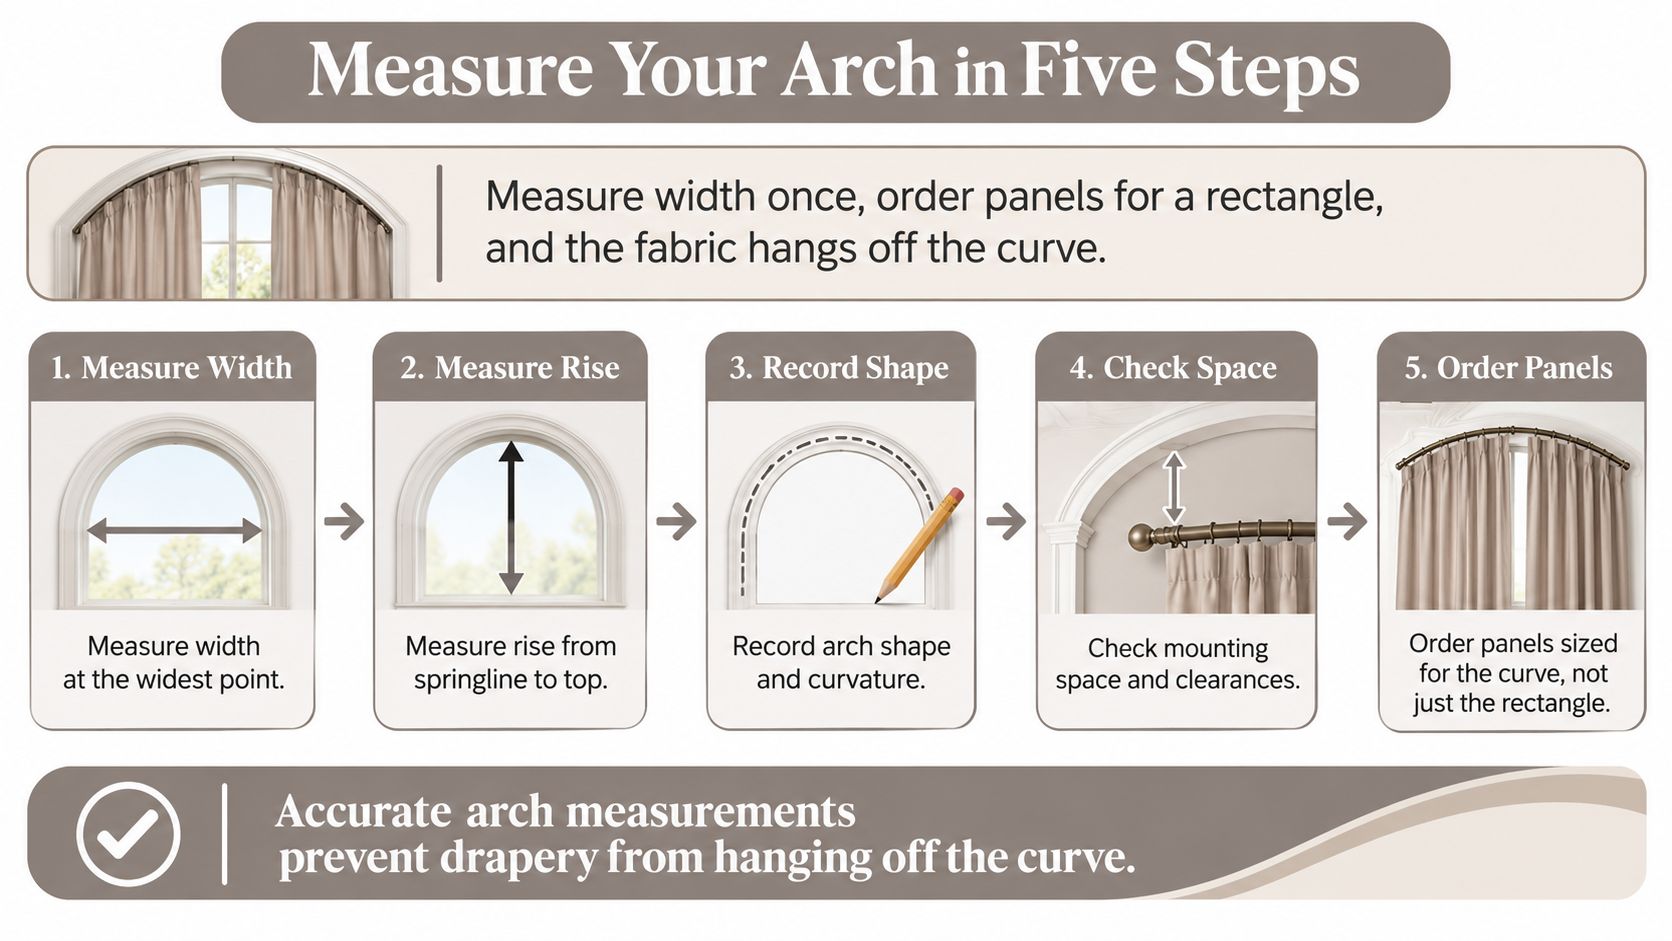
Five readings, taken in order
1. Width at the sill, the springline and just under the top of the arch. Casings, masonry and older construction produce nonparallel sides more often than people expect. Note all three numbers. Any difference between them tells the workroom the frame isn't square, which changes how the panels are cut and where the leading edge lands.
2. The springline. Mark the height where the straight vertical jamb turns into the curve. If the rod will hang below the arch, this is the number your drop starts from, not the floor-to-peak height.
3. Total height to the peak. Measure from the finished floor to the highest point of the arch, then measure from your proposed rod line down to the finished hem. Those are two different numbers and the workroom needs both.
4. Available mounting depth above and beside the frame. Depth decides whether a curved track or a straight rod can live there at all, and whether the brackets will clear the casing.
5. The arch radius or the length of the curved track. Run a flexible tape along the curve for track length, then check the chord, the rise and the radius against a level, laser or rigid straightedge. The tape alone won't tell you whether the curve is circular or elliptical.
| Arch type | Measure | Mounting note | Common mistake |
|---|---|---|---|
| Full-round | Chord width, springline height, rise to peak, radius | Rod often set above the arch so the curve stays visible | Measuring width only and treating the top as flat |
| Segmental (eyebrow) | Chord width, rise, springline height | Shallow curve; a straight rod may clear with stack-back | Assuming a circular radius without checking the rise |
| Gothic (pointed) | Width at springline, height to point | Panels usually stop at the springline with operable sides below | Fitting a rectangle to the pointed top |
| Fan or Palladian | Full width, fan radius, mullion positions | Mount on the flat transom or wall where possible | Ignoring mullions that block the carrier |
Then plan the stack. Allow 6 to 12 inches beyond each side of the window for stack-back so open panels don't sit over the glass, and specify the rod 8 to 12 inches wider than the opening. Send finished dimensions and cut dimensions to the workroom as two separate lines, because a workroom that receives one mixed number will guess, and the guess shows up in the hem.
Practical rule: Photograph every measurement with the tape visible in the frame, and keep all readings on a single sheet with the date and the room. When a number gets disputed later, the photo settles it in seconds.
If the arch sits inside a bay or a projecting alcove, the returned sides change what you record, and the Groen's Fine Furniture curtain guide is a useful companion for those layouts. For the underlying method on straight windows, which applies to the lower two thirds of every arch, this walkthrough on how to measure windows for curtains covers placement, drop and clearance.
Compare Contoured, Fixed-Return and Track Designs
A west-facing arch needs to control sun as well as frame the glass. Start by deciding whether the arch should remain visible, then choose a design that suits the room's light, operation and hardware load.
| Design | Arch coverage | Operation | Best for | Watch for |
|---|---|---|---|---|
| Contoured panels | Curved top follows the arch | Usually stationary or stacked | Full-round and segmental arches where the glass is the feature | Needs a template and curved hardware |
| Fixed returns | Stationary panel stops at the springline and the glass above stays visible | Lower drapes operate | Keeping the arch visible while controlling lower glass | Return depth must clear the casing |
| Curved tracks | Track follows the full arch | Full coverage, manual or motorized | Heavy linings and wide arches | Higher hardware cost and more complex installation |
Covering the curved glass gives the window a unified look, but does not guarantee the best solar control. Lawrence Berkeley National Laboratory's research on window treatments and solar heat gain describes how interior treatments can limit heat entering through windows. The result depends on the treatment and conditions, so consider the window's orientation, glazing and room use rather than choosing by appearance alone.
In a sunny room, a single full-height curtain may look dramatic yet leave bright edges around the arch or hold heat between the fabric and glass. A stationary panel over the arch with operable drapes below can balance the view and everyday light control.
Fabric and mounting affect performance, too. Lining changes how much light passes through, while a light or reflective backing can direct radiant heat back toward the glass. Outside-mount hardware that overlaps the frame can reduce edge light leakage compared with a frame-mounted rod. Each choice brings a trade-off: more coverage can mean more fabric weight and more demanding hardware.
Three room verdicts
A west-facing living room with a full-round arch. Consider contoured panels or a curved track with lining and a light-colored backing. Prioritize afternoon sun control; the continuous outline is a visual benefit.
A bedroom where the room must go dark. Pair a blackout-lined stationary arch panel with lower drapes on a fixed return. Set the return deep enough to close the sides and limit light leakage.
A dining room where the arch is the focal point and sun exposure is moderate. Fixed returns at the springline keep the arch visible. A sheer day layer beneath heavier side panels offers flexibility without requiring a full curved track; manual operation keeps the setup simple.
Calculate Fullness and Choose the Right Lining
An arch can look dramatic and still work poorly if the panels are too skimpy to close, too heavy for the hardware, or lined for the wrong light conditions. Set fullness from fabric weight, then choose lining for the room's light and privacy needs.
As a starting point, use the finished width and add more fullness as the fabric gets lighter. Heavy fabric generally needs less fullness than medium-weight fabric; sheers need more to gather well. Add hem allowances and the specified return dimensions before ordering yardage, and confirm the workroom's fullness preference before cutting.
| Fabric weight | Fullness approach | Typical use |
|---|---|---|
| Heavy fabric | Lower fullness, calculated from finished width | Lined panels in heavy linen or velvet |
| Medium-weight fabric | Moderate fullness, calculated from finished width | Unlined or lightly lined cotton and linen |
| Sheer | Higher fullness, calculated from finished width | Daytime layer beneath heavier panels |
For a pair of panels across a 96-inch finished width, calculate the fabric required from that width and the chosen fullness. Divide the total evenly between panels, then add allowances for hems, returns and any pattern matching. Workrooms quote from the finished width, so give them that measurement rather than the window opening.
What each lining does
Light-filtering lining softens daylight without making the room dark. It suits a living room or stair hall where the arch should remain bright.
Room-darkening or blackout lining reduces incoming light for bedrooms and media rooms. Lewis and Sheron Textiles offers blackout drapes that block external light and noise.
Interlining adds body and weight. That can help linen hang with a fuller shape, but it also increases the load on the track or rod.
Protective lining helps limit sun fading on upholstery, rugs and artwork below the window. Compare lining options in this guide to the role of drapery lining in custom drapes.
The energy benefit depends on the window and how the treatment is used. U.S. Department of Energy research reports that energy-efficient window coverings can cut heat loss through windows by 40% or more, equivalent to roughly 20% heating-energy savings in modeled circumstances (DOE building-energy analysis). Glazing, air leakage, fabric and whether the drapes stay closed all affect performance, so avoid promising a fixed result.
Keep fullness and lining in view when choosing fabrics for a custom sofa for the same room. A heavy, lined window treatment can outweigh light upholstery visually, while a sheer may need more gathering to hold its own.
Build a paper or muslin mock-up before the workroom cuts. Check panel symmetry, stack-back, hem break and operating force against the actual arch. Pay particular attention when the window is tall or the fabric has a large pattern repeat.
Choose Hardware and Motorization for Heavy Drapery
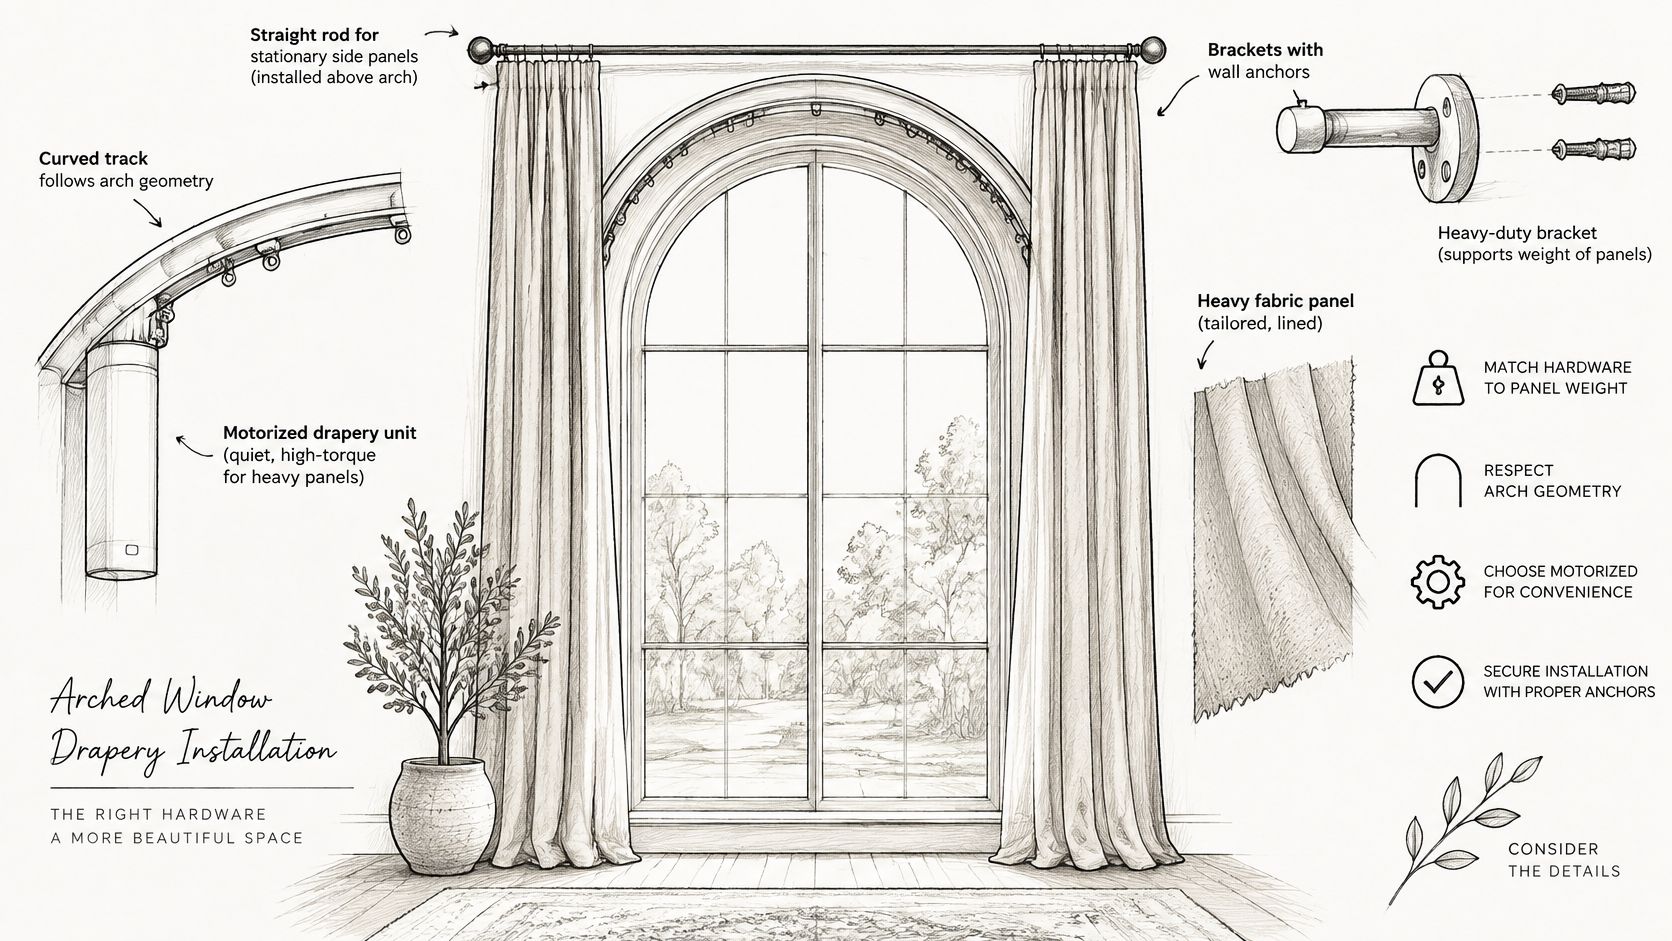
A tall arch can make a room feel grand, but heavy drapery that is hard to reach may stay closed and block useful daylight. Choose hardware and controls for the panel's weight, the window's height and how you want the room to function.
Safety shapes the control choice. ANSI/WCMA A100.1-2022 addresses hazardous accessible cords on stock window coverings, and manufacturer guidance favors cordless or inaccessible-cord designs (Draper child safety guidance). For an arched window, plan where controls will sit before specifying the treatment.
Access affects daily use. A U.S. Department of Energy survey found that at least 75% of coverings stay in the same position each day, while at least 56% of households don't adjust them daily (DOE residential windows and coverings report). If the drapes are difficult to reach, the chosen position may be the one they remain in. Motorized window coverings are a growing option, and smart-enabled products are expected to expand.
Decision points to settle before you buy
Power source. A battery motor avoids wiring and can suit a difficult-to-reach window. A hardwired motor with a wall switch needs a circuit, but avoids battery changes. The right choice depends on access to power and how often you expect to operate the drapes.
Concealment. A valance, soffit or deep ceiling pocket can hide the motor and track. Without enough space above the arch, visible hardware becomes part of the design.
Control redundancy. Check how the motor operates during a power cut and whether it has a manual override. A motor that cannot be operated during an outage can leave the room without practical light control.
Battery life under load. Heavy interlined panels place more demand on a motor than sheer panels. Ask for an expected replacement interval based on the specified panel weight, rather than relying on a general estimate.
Service access. Position the motor so it can be reached without dismantling the full assembly. The custom drapery hardware guide explains hardware options such as curved tracks and return brackets.
| Option | Cord exposure | Power access | Best for | Watch for |
|---|---|---|---|---|
| Cordless battery motor with remote | None | None needed | Tall or hard-to-reach lower drapes | Battery life under heavy lining |
| Hardwired motor with wall switch | None if concealed | Electrician for new circuit | Fixed control point near the door | Switch placement relative to the arch |
| Motor with home-automation hub | None if battery-powered | Hub and network | Voice or app control | Compatibility with the chosen motor |
| Manual cordless wand or pull | None | None | Stationary and light lower panels | Reach for users with limited mobility |
Coordinate a stationary arch panel with a motorized lower drape so they read as one composition. Match the heading, return depth and fabric direction; a visual mismatch can undermine the intended drama, while an oversized motor or poorly placed control can make the treatment awkward to operate.
Install Arched Drapes and Fix Common Problems
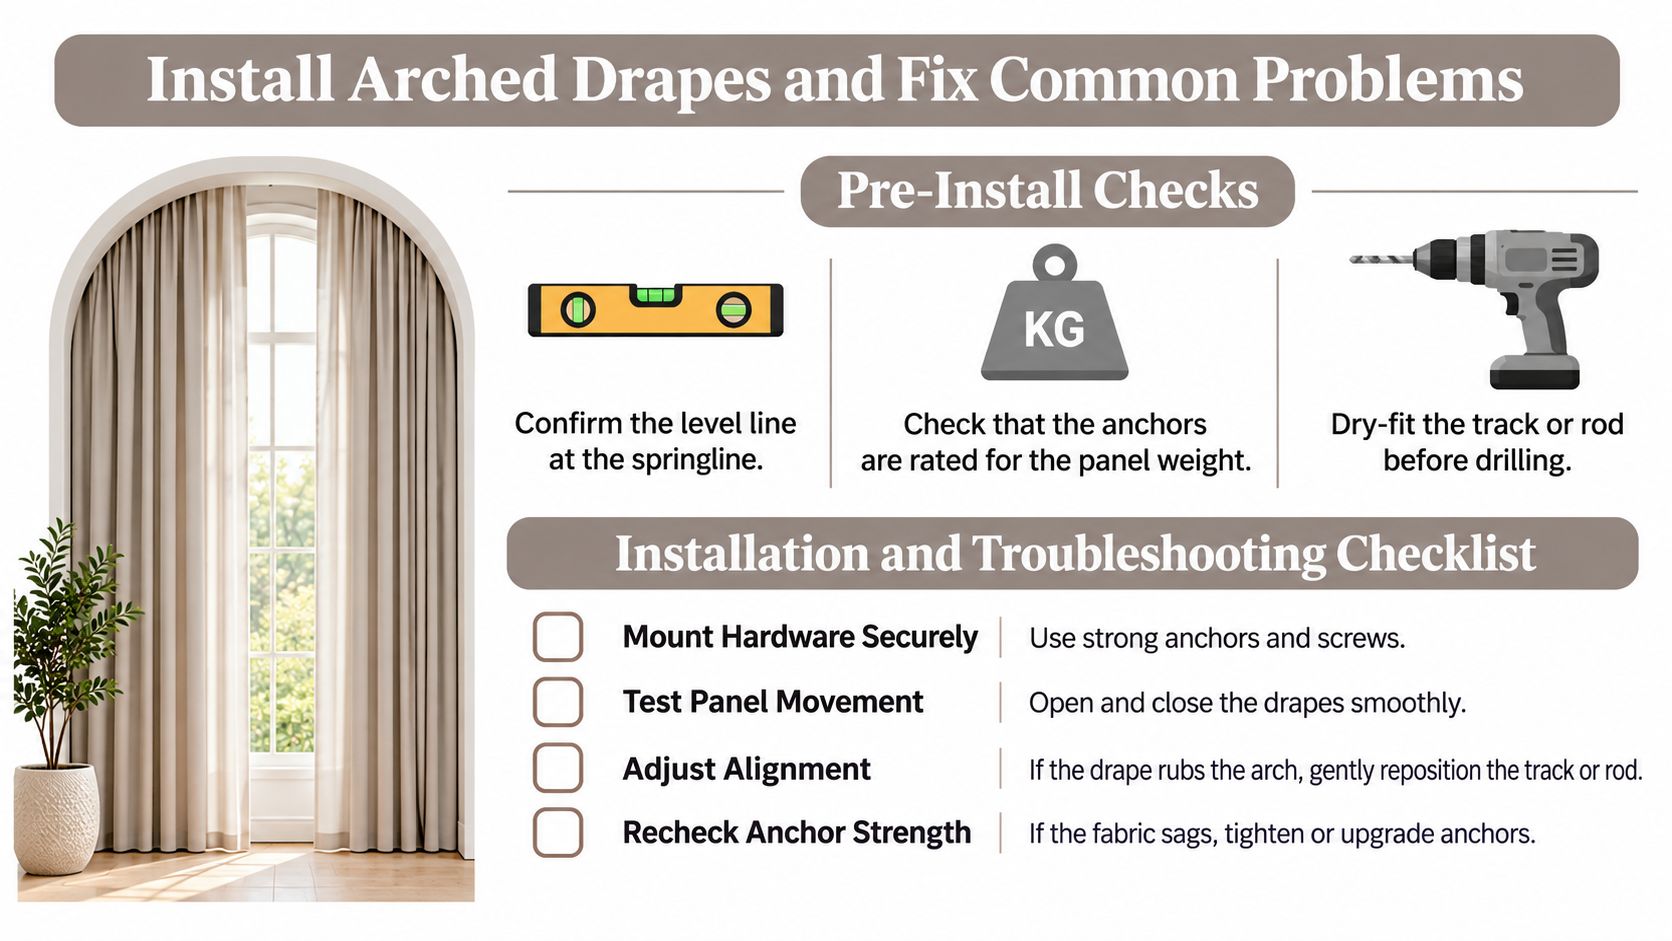
Dry-fit before you drill. Hold the track or rod against the wall, confirm the level line at the springline, and check that every bracket lands on a stud or a rated anchor for the panel weight. Ten minutes of holding hardware up saves an afternoon of patching plaster.
Then work in this order.
- Mark the level reference. Strike a level line at the springline and a second at the rod line, on both sides of the opening.
- Anchor the brackets. Studs first, rated anchors second, and never drywall plugs alone for an interlined panel.
- Set the curved track or rod. Check that it follows the arch without binding at the ends, where the curve tightens.
- Add the center supports. Space them at the manufacturer's stated interval for the load, not at whatever looks tidy.
- Hang and set the return depth. Close the leading edge against the wall and check the overlap at center.
- Run the full travel. Open and close the drapes three times and watch the hem, the returns and the carriers.
When something goes wrong
Center sag. Supports are missing or spaced too far apart for the weight. Add a support before you touch the fabric.
Binding on the curve. The track isn't fully seated, or a carrier is twisted. Release the tension and reset the track.
Light gaps at the returns. Return depth is too shallow, or the bracket stands the panel off the wall further than planned.
A crooked hem. This is almost always panel length, cut unevenly or hung on a rod that isn't level, rather than a fabric problem.
Drapes that drift open. The overlap at center is too small for the fabric weight, or the leading edge needs a magnetic or weighted closure.
Check this first: Before calling the workroom, run a finger along the top of the track and confirm every carrier is inside the channel. Half the "defective track" calls I hear about are a carrier that jumped out during installation.
For the first week, check the anchors once, run the drapes the full travel daily, watch for hem drift and photograph the finished stack so you can compare it after the fabric relaxes. If a neighboring small window needs a quick treatment while you plan the arch, these no-sew cafe curtain instructions from Lucas Furniture & Mattress are a reasonable temporary answer for a kitchen or bath.
Three Arched-Window Drape Setups in Practice
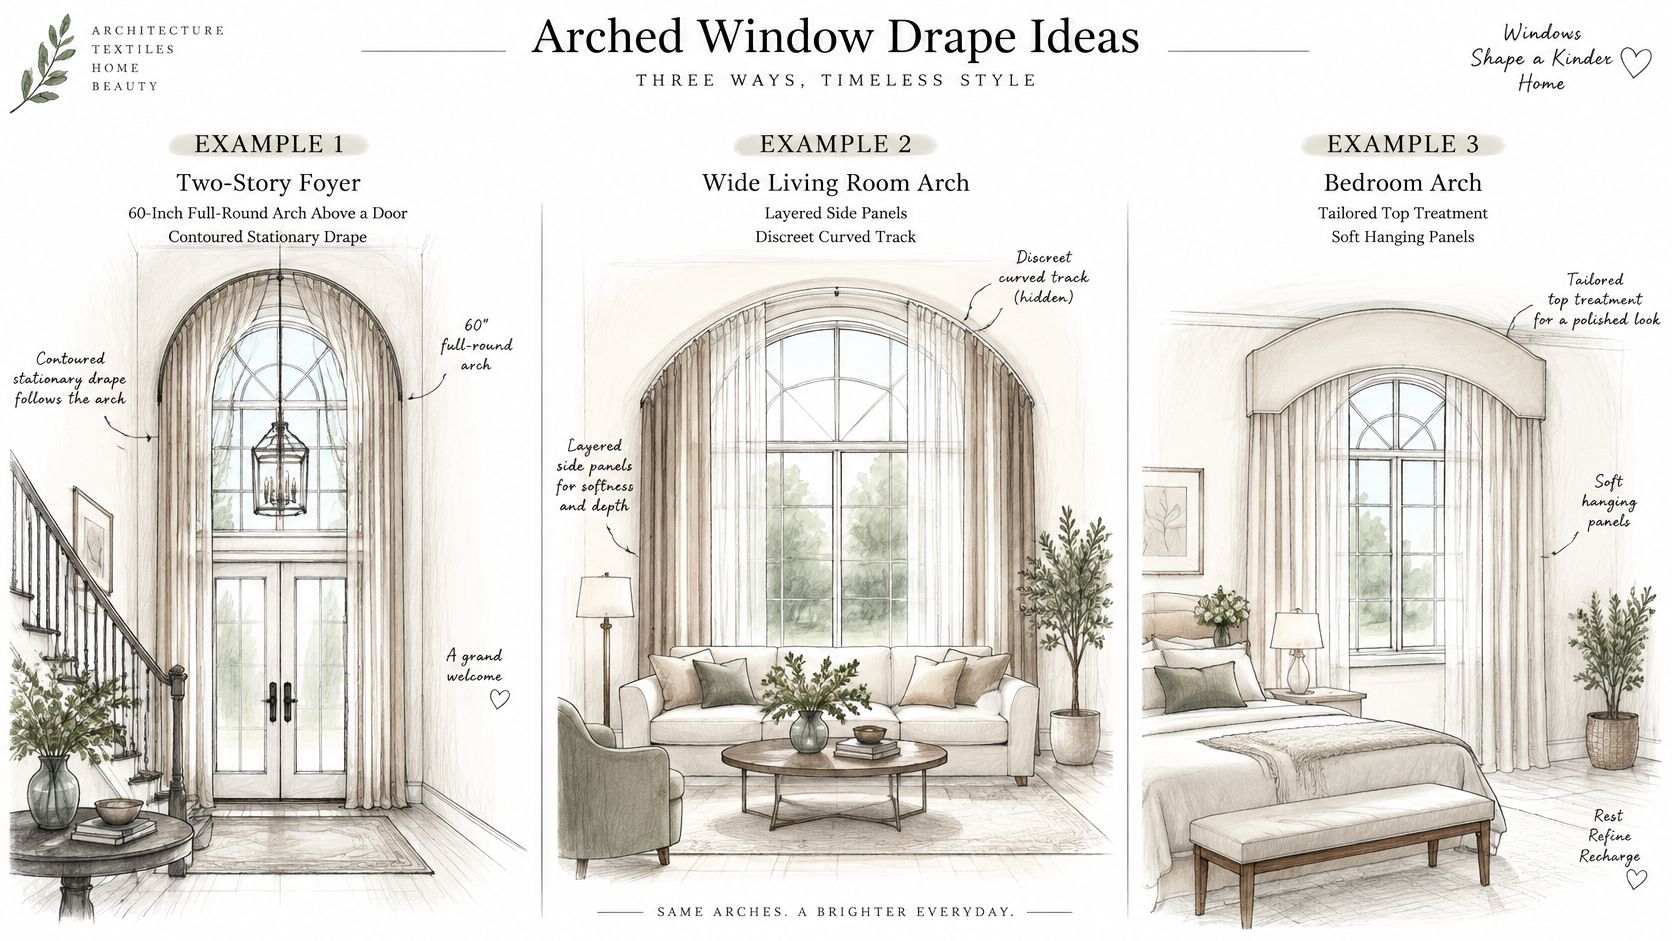
These are worked examples, not client case studies. Each one shows how the measurements drive the specification.
A two-story foyer with a full-round arch
The arch is 60 inches across, sits above the front door, and the rod line has to land high on the wall to keep the curve in view. The survey gives a chord width, a springline height and a rise that confirms a true half-round. The specification: a contoured stationary panel covering the arch, operable side panels on a curved track below, a light-filtering lining, and a motor for the lower panels because nobody is reaching that high twice a day. The homeowner gives up the option of full darkness in the foyer in exchange for a window that reads as architecture from the street.
A west-facing bedroom with a segmental arch
The rise is shallow, the exposure is brutal from 3 p.m. onward, and the room needs to be dark at 9 p.m. A blackout lining with a light-colored backing goes in, the arch panel is stationary, and the lower room-darkening drapes run on a fixed return. The motor hides inside a valance so the header stays clean. The trade-off is cost and a visible valance: the arch stays beautiful but the hardware stops being invisible.
A Gothic arch in a dining room
The point at the top makes full coverage awkward and expensive, and the exposure is moderate. Fixed returns stop at the springline, a sheer day layer sits under heavier side panels, and the operation is manual to save on hardware. What the homeowner gives up is a fully dark room at midday; what they keep is the shape they fell for.
Book a Measure and Confirm Your Design
A small measuring error at the curve can leave an arched drape uneven or force it to be remade. A professional measure helps confirm the shape before fabric is cut.
Start by speaking with Lewis and Sheron Textiles' Design Studio Associates about the custom drapes you want. Professionals can then come to your home or office to measure the space. Custom drapes take 4 to 6 weeks to produce, so allow for that lead time when planning a room.
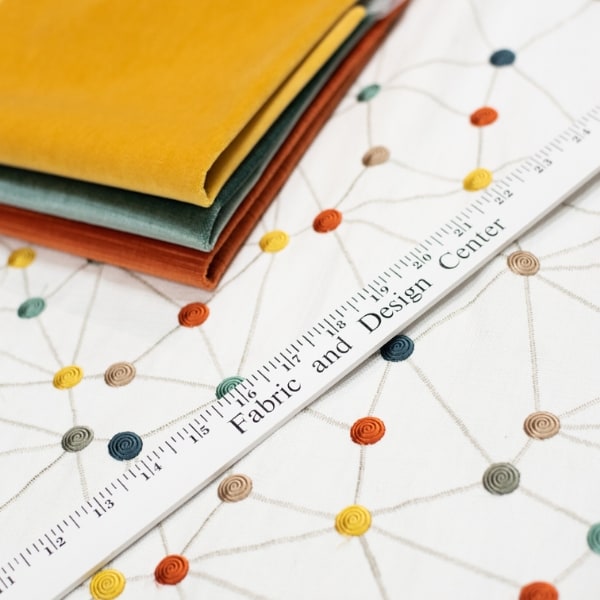
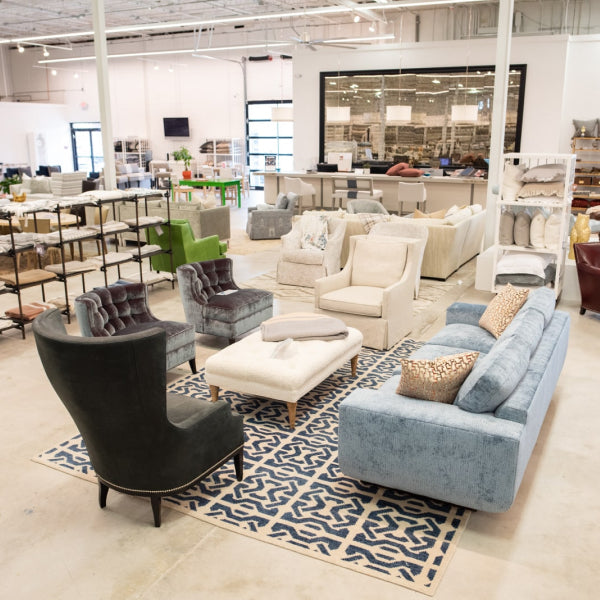
For the appointment, gather your measurements, note the arch type and how sunlight reaches the window, and decide whether you want motorization. Fabric samples are available in the Design Center; compare the face fabric and lining in the room's light before settling on them.
What drives the quote
Price depends mainly on fabric weight, lining grade, track type and motorization, so share your dimensions with the Design Studio Associates to get a quote for your window. A sheer on a straight rod and an interlined panel on a motorized curved track call for different materials and hardware.
Bring measurements on one sheet, your preferred design, fabric and lining samples, and a decision about motorization. Confirm the in-home measure before production begins.
Lewis and Sheron Textiles offers custom drapes in fabrics ranging from classic linen to modern sheers, with design details such as pleat style and trim. Discuss your window and priorities with the Design Studio Associates, then arrange a professional measure. Completed drapes can be picked up at the business location or delivered with white-glove service. Visit Lewis and Sheron Textiles to explore the fabrics in person.